What a Valve Cover Gasket Does and Why Leaks Happen
A valve cover gasket is a small, precisely shaped seal that sits between the engine’s valve cover and the cylinder head. Its job is straightforward but vital: keep engine oil inside the head where it lubricates camshafts, lifters, and rocker arms, and prevent contaminants from entering. When this seal fails, oil seeps out, collecting on the cylinder head, pooling in spark plug wells, or dripping onto the exhaust manifold. Even a minor leak can cause a burning smell, visible smoke, or that telltale wet grime along the engine’s upper perimeter.
Symptoms vary, but common ones include a sweet, burnt-oil odor after driving, a light mist of oil near the valve cover edge, or misfires caused by oil-soaked ignition coils and plugs. In some engines, you might notice a rough idle or hesitation because oil puddles inside spark plug tubes interfere with firing. Another clue is a slow but persistent oil loss between changes that isn’t explained by other leaks underneath the car.
The root causes behind a leaking gasket often come down to age and heat. Rubber hardens and shrinks, cork can become brittle, and even high-quality molded rubber loses elasticity over time. Heat cycles accelerate this wear, and if the PCV (positive crankcase ventilation) system is restricted, crankcase pressure can push oil past a previously healthy gasket. Over-tightening the valve cover fasteners can also distort the cover or pinch the gasket, creating an uneven sealing surface that invites leaks.
Ignoring the problem can get expensive. Oil on a hot exhaust can create smoke and a fire hazard, while oil in ignition wells can take out coils and plugs, leading to driveability problems and added repair bills. On engines with timing belts, chronic oil leaks can degrade the belt, risking catastrophic failure. Catching a failing gasket early—and replacing it correctly—prevents a small nuisance from becoming a major repair.
Choosing the Right Valve Cover Gasket: Materials, Fitment, and Best Practices
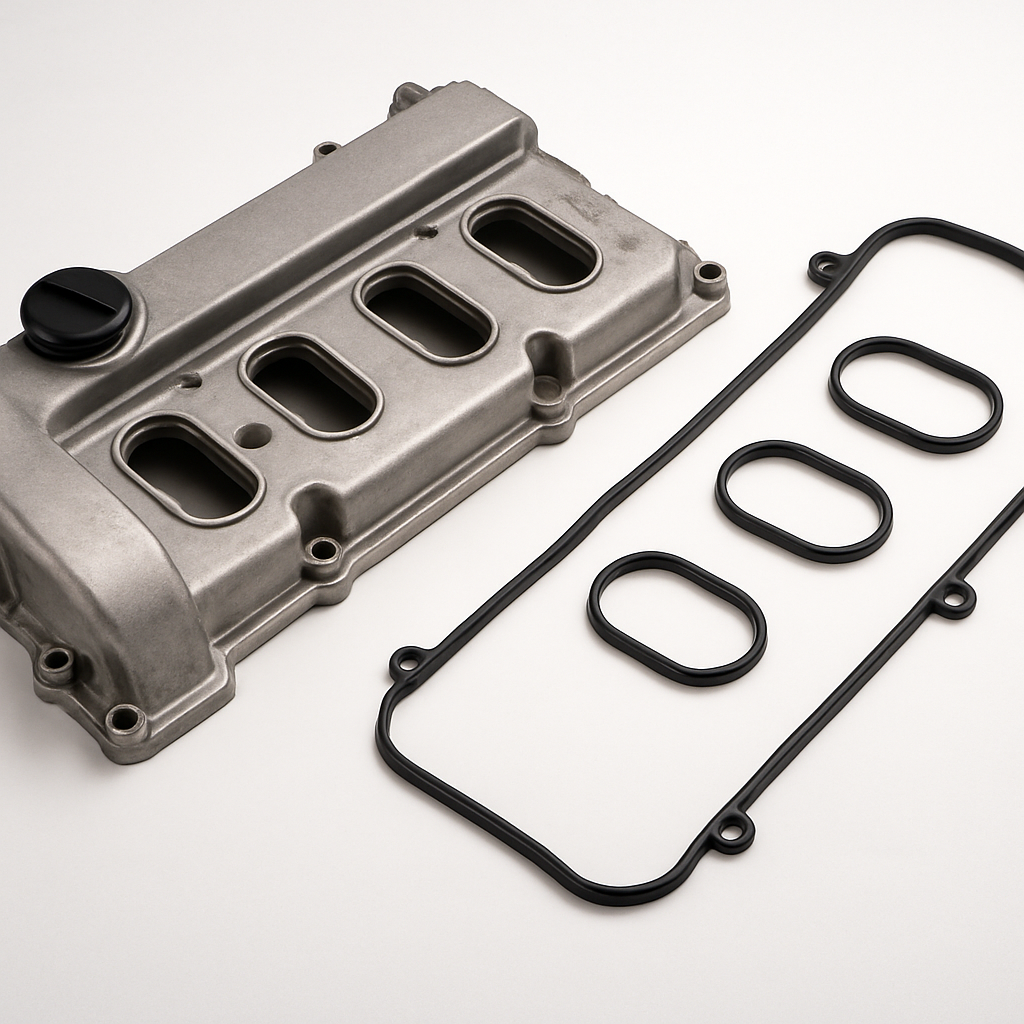
Gasket material matters. Most modern vehicles use molded rubber or silicone-blend gaskets that resist heat and maintain flexibility. These typically provide a long-lasting seal with minimal sealant. Older designs may use cork-rubber composite, which can seal well but is more sensitive to overtightening and heat cycling. Some engines use separate spark plug tube seals or half-moon cam plugs; make sure these are included with the kit for a complete job.
Fitment is equally critical. Always match the gasket to the exact year, make, model, engine code, and production date when applicable. Engines with dual overhead cams may have elongated, intricate gasket channels and multiple bolt grommets. Using the wrong shape or thickness compromises clamping force and sealing. When in doubt, check the service manual and compare the new part to the old one on a clean bench before installation.
Consider the entire sealing system. Replace valve cover bolt grommets if they are flattened, cracked, or oil-soaked, as they control clamping pressure and prevent leaks around fasteners. Inspect the valve cover itself for warping or corrosion, especially on older aluminum or steel covers. Clean mating surfaces thoroughly; old RTV or varnish can prevent the new gasket from seating. If the manufacturer calls for a dab of RTV at cam cap transitions or “half-moon” corners, use a high-temp, oil-resistant silicone sparingly—more is not better. The goal is to bridge small geometry changes, not to glue the whole gasket in place.
For budget and convenience, a complete kit is often best. Many DIYers and maintenance teams shop online to source the correct valve cover gasket quickly, bundling related items like spark plug tube seals, PCV grommets, and fresh coils or plugs when contamination is present. A platform with a broad selection of automotive hardware, tools, and accessories streamlines the process: you can pick up torque wrenches, solvent, nitrile gloves, and even new fasteners in the same order, minimizing downtime and ensuring compatibility.
How to Replace a Valve Cover Gasket Correctly: Steps, Tools, and Real-World Tips
Preparation makes the job smoother. Essential tools include a torque wrench, socket set, extensions, a plastic scraper, brake cleaner or engine-safe solvent, rags, and if specified, a small tube of high-temp RTV. Disconnect the battery when working near ignition components. Start by removing plastic engine covers, intake ducts, ignition coils, and harness clips that obstruct the valve cover. Keep hardware organized and note coil positions if they are not interchangeable.
With access clear, loosen valve cover bolts in a cross-pattern, a little at a time, to prevent warping. Lift the cover carefully; if it resists, use gentle prying at designated tabs only. Avoid gouging the sealing surfaces. Remove the old gasket and grommets, then clean the mating surfaces until they are free of oil, RTV residue, and debris. Do not sand or aggressively scrape aluminum heads—preserve the machined finish. This cleaning step is where many leaks are won or lost.
Test-fit the new gasket in the valve cover channel, ensuring it sits flat and does not roll or twist. Replace spark plug tube seals if your engine uses them, pressing them evenly to seat. If the service procedure calls for RTV at specific points—commonly at cam cap seams and sharp corners—apply a tiny bead and allow the flash time recommended on the tube. Then place the cover down squarely without smearing the gasket. Install bolts with new grommets finger-tight first, then torque in sequence to spec. Over-tightening is a prime cause of future leaks; the goal is uniform compression, not brute force.
Before reassembly, address the underlying causes. Check and replace a clogged PCV valve or hardened hoses that elevate crankcase pressure. Wipe oil from ignition wells, and if coils or plugs were oil-fouled, replace them to prevent misfires. Once everything is back together, start the engine and let it reach temperature. Inspect for seepage around the perimeter and at corners. A brief whiff of residual oil burning off is normal, but persistent smoke or wetness indicates a sealing issue that needs re-checking.
Consider a real-world scenario: a mid-mileage sedan arrives with a burnt-oil smell and a stumble at idle. Inspection reveals oil pooled in two plug wells and a damp perimeter around the cover. The fix involves a molded rubber gasket set with tube seals, fresh coil boots, and a new PCV valve. After careful surface prep, sparing RTV at the cam cap corners, and torquing to spec, the misfire clears and the smell disappears. The entire repair fits within an afternoon for a prepared DIYer, thanks to having all parts and tools on hand.
Long-term success depends on details: using the correct torque sequence, replacing grommets, cleaning thoroughly, and verifying PCV function. With these steps, a valve cover gasket replacement restores oil control, protects ignition components, and keeps the engine bay clean—an affordable, high-impact repair for both daily drivers and fleet maintenance programs.
Karachi-born, Doha-based climate-policy nerd who writes about desalination tech, Arabic calligraphy fonts, and the sociology of esports fandoms. She kickboxes at dawn, volunteers for beach cleanups, and brews cardamom cold brew for the office.